In this article, you will learn about the importance of maintaining and caring for your steam cleaner. We will explore the key steps you can take to keep your steam cleaner in top shape, allowing it to perform effectively and extend its lifespan. By following these maintenance tips, you will ensure the longevity and efficiency of your steam cleaner, saving you time and money in the long run.
Firstly, it is crucial to regularly clean and descale your steam cleaner to prevent any build-up of mineral deposits. This can be done by simply rinsing the tank and wiping the heating element with a soft cloth. Additionally, make sure to empty and dry the water tank after each use to avoid any lingering moisture that may lead to mold or mildew. Secondly, remember to check and clean the brushes and nozzles of your steam cleaner regularly. This will help to remove any residue or debris that may impede its performance. Lastly, don’t forget to store your steam cleaner in a clean and dry place, away from direct sunlight or extreme temperatures, to maintain its overall condition. By following these simple maintenance steps, you can ensure that your steam cleaner will always be ready to tackle any cleaning task that comes its way.
Inspecting and Cleaning the Water Tank
Emptying and rinsing the water tank
One of the most important maintenance tasks for your steam cleaner is inspecting and cleaning the water tank. Start by emptying the tank completely. This will ensure that any residual water or impurities are removed before you begin the cleaning process.
After emptying the tank, rinse it thoroughly with clean water. This will help to remove any remaining dirt or debris. Make sure to remove any detachable parts from the tank, such as filters or caps, and clean them separately using a mild detergent.
Checking for any mineral build-up
Mineral build-up is a common issue in steam cleaners, especially if you live in an area with hard water. To check for mineral build-up, inspect the bottom of the water tank and look for any white or yellowish deposits.
If you notice any mineral build-up, it is important to address it promptly. This can be done by soaking the affected parts in a mixture of vinegar and water. Allow the parts to soak for a few hours, then scrub them gently with a soft brush to remove the deposits.
Descaling the water tank
Descaling your steam cleaner’s water tank is another important maintenance task. Over time, mineral build-up can accumulate and impede the proper functioning of your steam cleaner.
To descale the water tank, mix equal parts of vinegar and water and pour it into the tank. Let the solution sit for a few hours to loosen the mineral deposits. Then, empty the tank and rinse it thoroughly with clean water.
Cleaning the Steam Nozzle and Brush
Removing the steam nozzle and brush
The steam nozzle and brush are critical components of your steam cleaner. To clean them properly, start by removing these attachments from the main unit.
Gently detach the steam nozzle and brush from the steam cleaner, following the manufacturer’s instructions. Be careful not to force any parts, as this can cause damage.
Clearing any blockages
Once you have removed the steam nozzle and brush, inspect them for any blockages. Blockages can occur due to dirt, debris, or mineral build-up. Use a small brush or toothpick to clear any obstructions.
If the blockage is more severe, you may need to soak the attachments in warm soapy water. This will help to loosen any stubborn debris and make it easier to remove.
Sanitizing the steam nozzle and brush
After clearing any blockages, it is important to sanitize the steam nozzle and brush. This can be done by wiping them down with a clean cloth soaked in a mild disinfectant solution.
Make sure to thoroughly clean all the crevices and hard-to-reach areas. This will help to prevent the growth of bacteria and ensure that your steam cleaner remains hygienic.
This image is property of images.unsplash.com.
Maintaining the Steam Pressure and Temperature
Checking the pressure and temperature levels
In order to ensure the optimal performance of your steam cleaner, regularly check the pressure and temperature levels.
Start by referring to the user manual to identify the recommended pressure and temperature settings for your specific model. Then, turn on the steam cleaner and wait for it to reach the desired pressure and temperature. Use a pressure gauge and a thermometer to verify that the levels are within the recommended range.
Adjusting the steam settings
If you find that the pressure or temperature levels are outside of the recommended range, you may need to adjust the steam settings on your steam cleaner.
Most steam cleaners have adjustable settings that allow you to increase or decrease the pressure and temperature. Use the controls on your steam cleaner to make the necessary adjustments. Keep in mind that it may take some trial and error to find the optimal settings for your specific cleaning needs.
Cleaning or replacing the pressure regulator
If you notice a significant decrease in steam pressure despite adjusting the settings, it is possible that the pressure regulator may be clogged or damaged. To address this issue, you will need to clean or replace the pressure regulator.
Refer to the user manual for instructions on how to clean or replace the pressure regulator on your specific steam cleaner model. If you are unsure or uncomfortable with this process, it is recommended to contact the manufacturer or a professional technician for assistance.
Removing and Cleaning the Attachments
Detaching the cleaning attachments
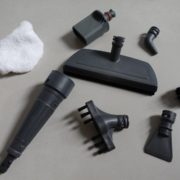
Your steam cleaner may come with a variety of cleaning attachments, such as brushes or scrubbing pads. These attachments are designed to tackle different types of stains and surfaces.
To remove the attachments, refer to the user manual for instructions specific to your steam cleaner model. Carefully detach each attachment, taking note of how they are connected and where they go for future reference.
Cleaning the attachments with hot soapy water
Once the attachments are removed, it’s time to clean them. Fill a sink or basin with hot soapy water and place the attachments in the water. Allow them to soak for a few minutes to loosen any dirt or grime.
After soaking, use a soft brush or cloth to gently scrub the attachments. Pay close attention to any areas that may be particularly dirty or stained. Rinse the attachments thoroughly with clean water to remove any soap residue.
Drying and storing the attachments properly
After cleaning, it is important to ensure that the attachments are completely dry before storing them. Use a clean towel or allow them to air dry naturally. Moisture can lead to the growth of mold or mildew, so make sure the attachments are completely dry.
Once dry, store the attachments in a clean and dry area. Some steam cleaners come with storage compartments or hooks to keep the attachments organized. If your steam cleaner does not have designated storage, consider using a small container or bag to keep the attachments together.
Cleaning and Unclogging the Steam Hose
Disconnecting the steam hose
The steam hose is the main pathway through which the steam travels from the water tank to the cleaning attachments. Over time, the steam hose can become clogged or dirty, impacting the performance of your steam cleaner.
To clean the steam hose, start by disconnecting it from the main unit. Refer to the user manual for instructions specific to your steam cleaner model. Be careful when disconnecting the hose to avoid any damage.
Flushing out any debris or clogs
Once the steam hose is disconnected, inspect it for any debris or clogs. Use a long, flexible brush or a pipe cleaner to gently remove any obstructions. Run water through the hose to flush out any remaining debris.
If the clogs persist, you may need to soak the steam hose in a mixture of warm water and vinegar to help loosen the blockage. Allow the hose to soak for a few hours, then rinse it thoroughly with clean water.
Checking for any damages or leaks
While cleaning the steam hose, take the opportunity to inspect it for any damages or leaks. Look for any cracks, tears, or signs of wear and tear. A damaged hose can compromise the steam pressure and result in reduced performance.
If you notice any damages or leaks, it is important to address them promptly. Depending on the severity of the damage, you may need to repair or replace the steam hose. Contact the manufacturer or a professional technician for guidance and assistance.
Maintenance of the Power Cord and Plug
Inspecting the power cord for damages
The power cord is an essential component of your steam cleaner. Regularly inspect the power cord for any damages or fraying. A damaged power cord can pose a safety risk and should be addressed immediately.
If you notice any damages or fraying, it is important to stop using the steam cleaner until the power cord is repaired or replaced. Contact the manufacturer or a professional technician for assistance with this task.
Cleaning and drying the power cord
To keep the power cord in good condition, it is recommended to periodically clean and dry it. Use a clean cloth or sponge to wipe down the power cord, removing any dirt or debris. Make sure to pay attention to any areas that may be particularly dirty or sticky.
After cleaning, allow the power cord to dry completely before using or storing the steam cleaner. Moisture can cause damage to the electrical components and increase the risk of electrical shock.
Ensuring the plug is secure
Before using your steam cleaner, always ensure that the plug is securely connected to an appropriate power outlet. A loose or improperly connected plug can result in a loss of power or even electrical shock.
Make it a habit to check the plug connection before each use. If you notice any loose connections or issues with the plug, do not use the steam cleaner until the problem is resolved. Contact the manufacturer or a professional technician for guidance and assistance.
This image is property of images.unsplash.com.
Storing the Steam Cleaner Properly
Emptying any remaining water
Properly storing your steam cleaner is crucial to maintain its longevity and performance. Before storing the steam cleaner, make sure to empty any remaining water from the water tank.
Leaving water in the tank can lead to the growth of mold or mildew. To empty the water tank, follow the manufacturer’s instructions and ensure that all the water is completely drained.
Allowing the unit to dry completely
After emptying the water tank, it is important to allow the unit to dry completely before storing it. This will help prevent the growth of mold or mildew and ensure that the steam cleaner remains in good condition.
Give the unit ample time to air dry naturally. Avoid using any heat sources or hair dryers to speed up the drying process, as this can damage the internal components.
Storing in a cool and dry place
Once the steam cleaner is dry, it is time to find a suitable storage location. Choose a cool and dry place that is away from direct sunlight and extreme temperatures. Excessive heat or cold can affect the performance and lifespan of the steam cleaner.
If possible, store the steam cleaner in its original packaging or a dedicated storage bag. This will help protect it from dust, dirt, and potential damage.
Regularly Cleaning and Descaling
Performing regular cleaning of the steam cleaner
Regular cleaning is key to maintaining the performance and effectiveness of your steam cleaner. In addition to the specific maintenance tasks discussed earlier, it is important to regularly clean the entire unit.
Start by wiping down the exterior of the steam cleaner with a clean cloth or sponge. Pay attention to any areas that may be particularly dirty or sticky. Use a mild detergent or cleaning solution to remove any stains or residues.
After cleaning the exterior, turn your attention to the internal components. Use a soft brush or cloth to gently remove any dirt or debris from the nozzles, attachments, and hoses. This will help ensure that your steam cleaner operates at its best.
Using vinegar or descaling solution
In addition to regular cleaning, it is important to regularly descale your steam cleaner. Descaling refers to the process of removing mineral deposits that can build up inside the unit.
To descale your steam cleaner, fill the water tank with a mixture of equal parts vinegar and water. Allow the solution to circulate through the system for a few minutes, then empty the tank. Rinse the tank thoroughly with clean water to remove any vinegar residue.
If you prefer, you can also use a descaling solution specifically designed for steam cleaners. Follow the manufacturer’s instructions when using a descaling solution to ensure safe and effective results.
Preventing mineral build-up
To prevent excessive mineral build-up in your steam cleaner, consider using distilled water instead of tap water. Distilled water has a lower mineral content and is less likely to contribute to deposits.
If distilled water is not readily available, consider using a water filter designed specifically for steam cleaners. These filters can help reduce the mineral content in tap water and prolong the lifespan of your steam cleaner.
Troubleshooting Common Issues
Lack of steam or low steam pressure
If you are experiencing a lack of steam or low steam pressure, there are a few potential causes to consider.
First, check the water tank to ensure that it is filled to the recommended level. A low water level can result in reduced steam production.
Next, check the steam nozzle and brush for any blockages. Clear any obstructions using a small brush or toothpick. If necessary, soak the attachments in warm soapy water to loosen stubborn debris.
If the issue persists, check the pressure and temperature levels of your steam cleaner. Refer to the user manual for instructions on how to adjust the settings to optimize steam production.
Water leakage from the steam cleaner
Water leakage from the steam cleaner can be a frustrating issue. There are several potential causes to investigate.
First, check the seals and gaskets on the water tank and steam nozzle. Over time, these seals may become worn or damaged, resulting in leaks. If you notice any issues with the seals or gaskets, contact the manufacturer for replacement parts.
Next, check the connections between the water tank, steam nozzle, and hoses. Ensure that all connections are secure and tight. If a connection appears loose, try tightening it or contacting the manufacturer for assistance.
If the leakage persists, it is recommended to contact the manufacturer or a professional technician for further diagnosis and repair.
Malfunctioning power or control buttons
If you are experiencing issues with the power or control buttons on your steam cleaner, there are a few troubleshooting steps you can take.
First, check the power cord connection to ensure that it is securely plugged into a power outlet. A loose connection can result in a loss of power or control.
Next, inspect the buttons themselves for any dirt or debris. Use a soft brush or cloth to gently clean the buttons, ensuring that they are free from any obstructions.
If the issue persists, refer to the user manual for instructions on how to reset the steam cleaner or troubleshoot specific control issues. If necessary, contact the manufacturer or a professional technician for further assistance.
Conclusion
Proper maintenance and care of your steam cleaner is essential to ensure its longevity and optimal performance. By following the steps and tips outlined in this article, you can keep your steam cleaner running smoothly for years to come.
Regularly inspect and clean the water tank, steam nozzle, and brush to remove any dirt, debris, or mineral build-up. Maintain the steam pressure and temperature by checking and adjusting the settings as needed. Take the time to remove and clean the attachments, and ensure that the steam hose is free from any blockages or damage.
Pay attention to the power cord and plug, ensuring that they are in good condition and securely connected. When storing your steam cleaner, empty any remaining water, allow it to dry completely, and store it in a cool and dry place.
Regularly clean and descale your steam cleaner to prevent mineral build-up and optimize its performance. Troubleshoot common issues such as lack of steam, water leakage, or malfunctioning controls, and seek professional assistance if needed.
By investing time in the maintenance and care of your steam cleaner, you can save money on replacements or repairs and enjoy the benefits of a clean and hygienic home.


